About Me

.png "Location") Location
Location
the United Arab Emirates

 Birthday
 Nationality

 Visa
Visa
the United Arab Emirates
My Experiences
Education
-
1.
Queen's University

 Duration
September 2021 - June 2023
Duration
September 2021 - June 2023.png "Location") Location
Kingston, Ontario, Canada
Location
Kingston, Ontario, Canada
 Degree
Master's Degree
Degree
Master's Degree Major
Computing Sciences
Major
Computing Sciences GPA
3.50
GPA
3.50 Website
Webpage
Website
Webpage
Description
-
My time in Queen's University was good. I did not only learn about game development, but also other fields in computer sciences, including human-computer interaction, cyber-Security, and statistics. The university was ranked the 7th in the world in 2022 (During my time there). Here are some points of my experiences in the university:
- Learned about Game Architecture, Artificial Intelligence, Physics, and Networking in Unity;
- Used a program called RSTARE to program a software (uses C++);
- Learned about User Interfaces;
- Learned about Collecting Data in Python, using NumPy and Pandas;
- Studied Cyber-Physical Security;
- Studied Semantics in Programming Languages;
- Built two video games in Unity for both platforms, PCs and smartphones;
- Learned new techniques in programming video games These techniques include:
- Made an interface to make a playable character perform actions across multiple input devices;
- Learned about advanced Human-Computer Interaction.


-
2.
Sheridan College
 Duration
September 2017 - October 2018
Location
Oakville, Ontario, Canada
Degree
Post-Graduate Certificate
Major
Game Development: Advanced Programming
GPA
3.18
Website
Webpage
Duration
September 2017 - October 2018
Location
Oakville, Ontario, Canada
Degree
Post-Graduate Certificate
Major
Game Development: Advanced Programming
GPA
3.18
Website
Webpage
Description
At Sheridan College, I learned new techniques about video games and how the game industry works. The platform that I used at my time there was Unity. During my time there:- Learned how to save memory and prevent memory leakage in programming for video games;
- Implemented XML parsing in programming;
- Learned about creating decision managers in Unity;
- Have experience in how to debug code scripts;
- Created a game project similar to "Zork", a game made in the late 1970s with no graphics, but only texts and giving commands. Besides using C++ in Visual Studio, the mini-project we had to build incorporated XML parsing to load characters, objects and items, scenes and areas, and links between them.
- Learned about the history of games, video games, how the industry works, and how to manage projects and team members.
- Worked with a team to make a mobile game for the iPhone for a capstone project. The team had: One more developer besides me, two designers, and an artist.
-
3.
University of Sharjah
 Duration
September 2013 - January 2017
Location
Sharjah, the United Arab Emirates
Degree
Bachelor's Degree
Major
Information Technology Multimedia
GPA
3.23
Website
Webpage
Duration
September 2013 - January 2017
Location
Sharjah, the United Arab Emirates
Degree
Bachelor's Degree
Major
Information Technology Multimedia
GPA
3.23
Website
Webpage
Description
My time at the University of Sharjah was the first time I have learned about programming. Some of the languages I learned included:- C++;
- Java;
- HTML;
- php;
- SQL; and
- JavaScript (for Unity and HTML only);
- Game Development;
- Multimedia Programming;
- 3D Animations;
- Graphics Design;
- Web Programming;
- Video Editing; and
- Database Programming.
Projects
-
1.
University Zombie Crisis
 Category
Video Game
Duration
September 2015 - May 2016
Category
Video Game
Duration
September 2015 - May 2016 Company
University of Sharjah
Location
Sharjah, the United Arab Emirates
Company
University of Sharjah
Location
Sharjah, the United Arab Emirates
Description
This was my graduation project during my bachelor's program in the University of Sharjah. We used Unity to build this game. However, back then, we used JavaScript as our programming language, instead of C#, and the platform we used for scripting was MonoBehaviour.
The project was a first person shooter (FPS) game where the player needs to shoot zombies in the university's campus (specifically, the men's section). The arena of the game (which is the campus) consisted of 7 buildings:- M4;
- M5;
- M6;
- M7;
- M8;
- M9 (Locked at first); and
- M10.
The game is divided into 5 phases (we called them "waves"), and they are done in their respective order:- Shooting 20 zombies;
- Activating an elevator;
- Rescuing a hostage;
- Fighting a boss; and
- Destroying a scepter.
As mentioned earlier, this is an FPS game. So, mainly the campus is completely covered in zombies who are either patrolling around by default, or attacking the player when he/she is too near to one.
The plot
The plot of the game starts with the University of Sharjah (UoS) being invited to a conference in Argentina. The conference is for students from universities from around the world to present their projects. UoS accepted the invitation, travelled to Buenos Aries, and reserved a hotel there. UoS's group consisted of some students (roughly between 20 or 30), two instuctors, and a vice-chancellor who would be the main representative of the university.
One day, the group went to a museum to as tourists, and they were accompanied by a tour guide. As they were exploring the place, at one point, they entered a room that strictly had no window. In the room, there was a display of crown jewels. It was said that the jewels belonged to the ancient king of the Undead. While the crown was obviously the most supreme and prominent of all of the jewels, another piece was said to be the most dangerous.
In ancient times, day times would be safe from dark reigns. At night, however, there would appear an evil king who would rise his scepter to the moon. When the scepter's jewel is struck by moonlight, zombies would arise from the grounds around the king, ready to serve him. With his horde of zombies, the king would terrorize villages, kill innocent people, and expand his evil dynasty. Night after night, he would rise his scepter over and over again, to expand his army and slaughter anyone who stands in his way. It would seem that all hope is lost. Until finally a group of heroic warriors decided to put an end to the evil king. They fought bravely again the king and his army, toppling down his dark empire, and liberating the innocent people. The king tried to escape, but he was eventually surrounded by his foes. The king has died and the heroes screamed victory and freedom. They wrote history on a cloth and wrapped the cloth around the scepter.
Everyone in the group were amazed by the story. Then they continued their tour around the museum.
A few days later was the conference. The student were getting their projects ready for display. They were competing with other students from other invited universities. The judges came to evaluate all of the groups, where each group represented their university. The judges went to each group, one-by-one, taking notes from each in every student and his/her project to evaluate the his/her capabilities. After the judges were done evaluating, they would take 30 minutes to make their final decision. Then it was time to announce the winners. The winner was... the University of Sharjah! The students cheered for their win and came on stage to get their prize. The judges handed over a big, gorgeous wooden box to the winners, and when they opened the box, it had a replica of the scepter that the students saw in the museum the other day. Photos were being taken for this joyful and proud moment.
It was time to head back home. They took a plane to head back to the UAE, and everyone was excited to share their experiences in Argentina. The first day after the weekend, students and teachers were preparing a small presentation event in M9, where they would share their expereinces in Argentina. It was a pleasant experience, they would like to do it again. They event proudly showed the audience the replica scepter that they won and shared its origins. When the event was done, the audience gave an applause to the presenters. Then the presenters proudly placed their prize in the cabinet in M9. Another applause was given.
But danger lurks in every corner... At night, the moon was high enough in the sky that it is difficult not be seen without a window. The moon's light hit the roof windows of M9, while the scepter was still inside the building... Despite it being a replica, it will function as its original... As the moonlight hit the top jewen of the scpeter, the jewel started to glow brighter and brighter. A security gaurd patrolling around the campus suddenly noticed zombies arising from the grounds of the campus. Terrified, he ran with his life to call the rescue team to solve this problem. The gaurd managed to run and hide. Finally, the SWAT team arrived, and the game begins...
Slideshow
This is the main video of the project.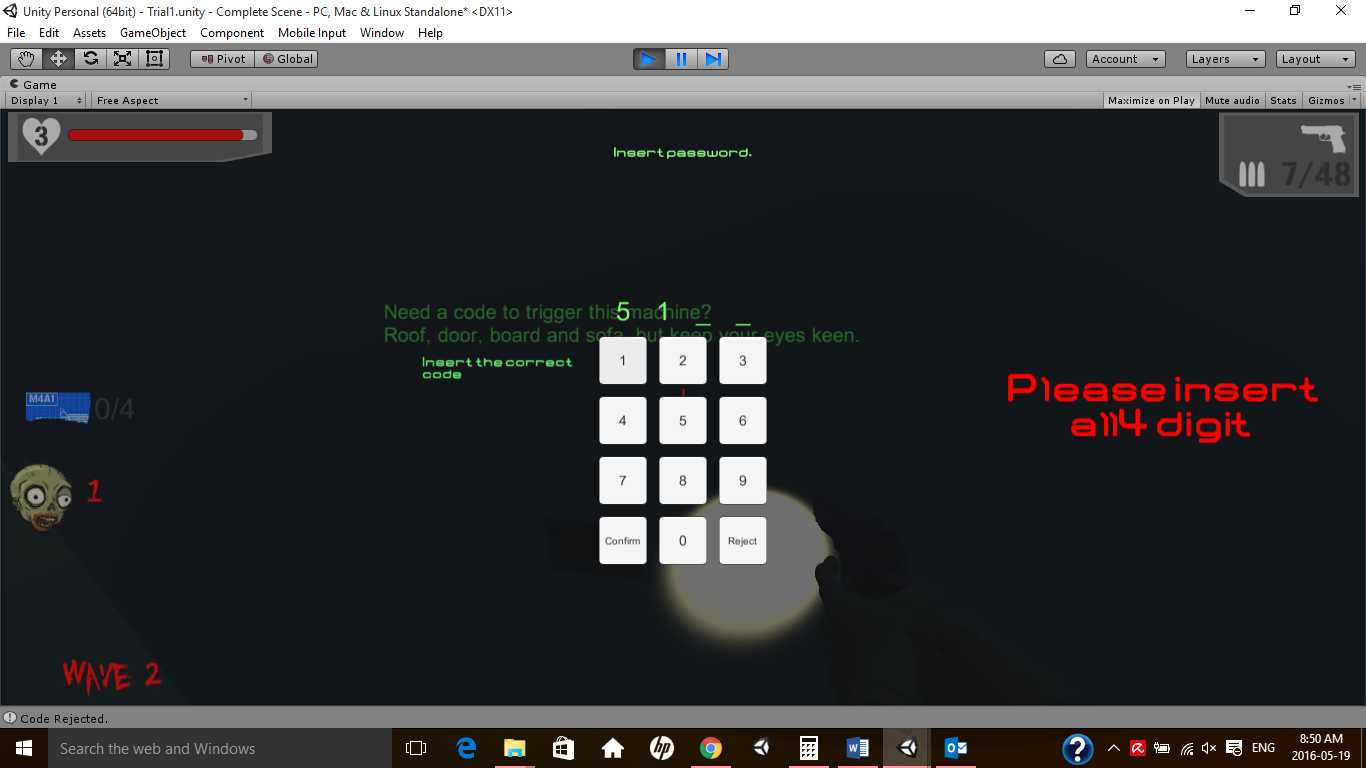 This is the UI to insert the code to access the elevator. After inserting the correct code, phase 2 is complete.
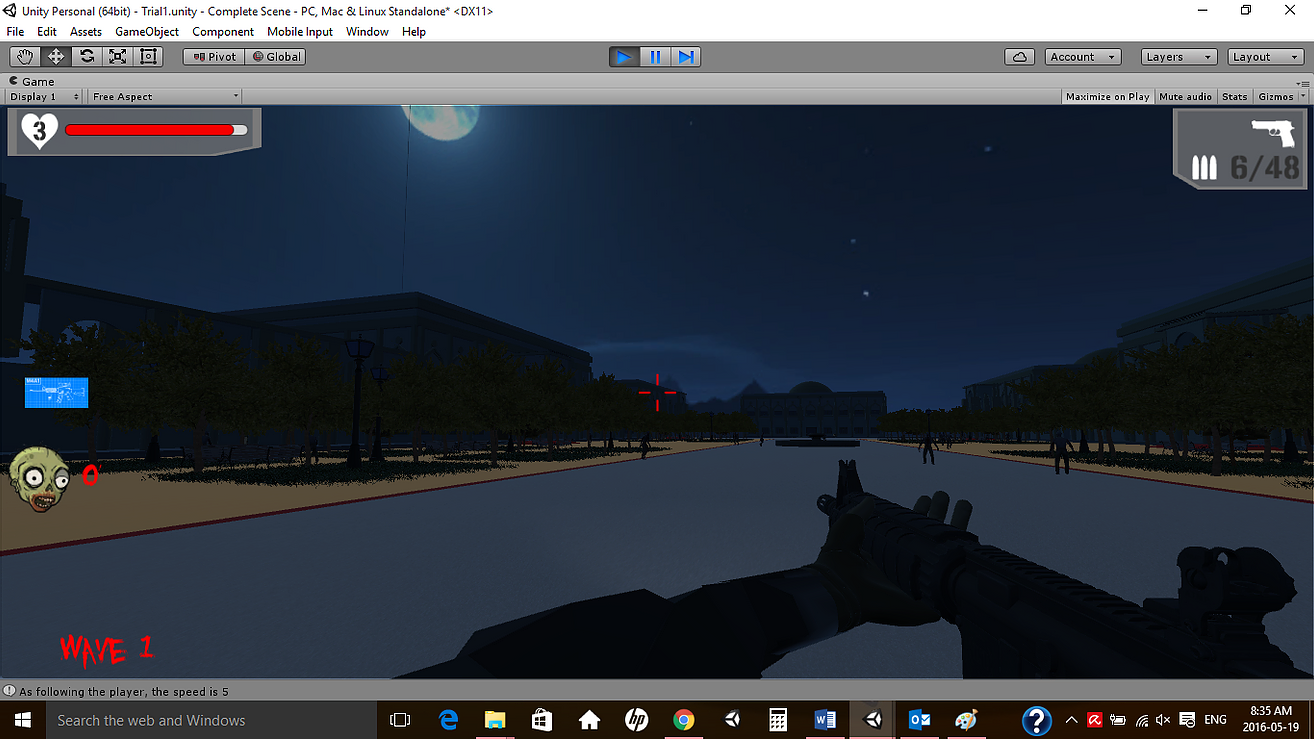 Switching and using the M4A1 rifle instead of the firearm.
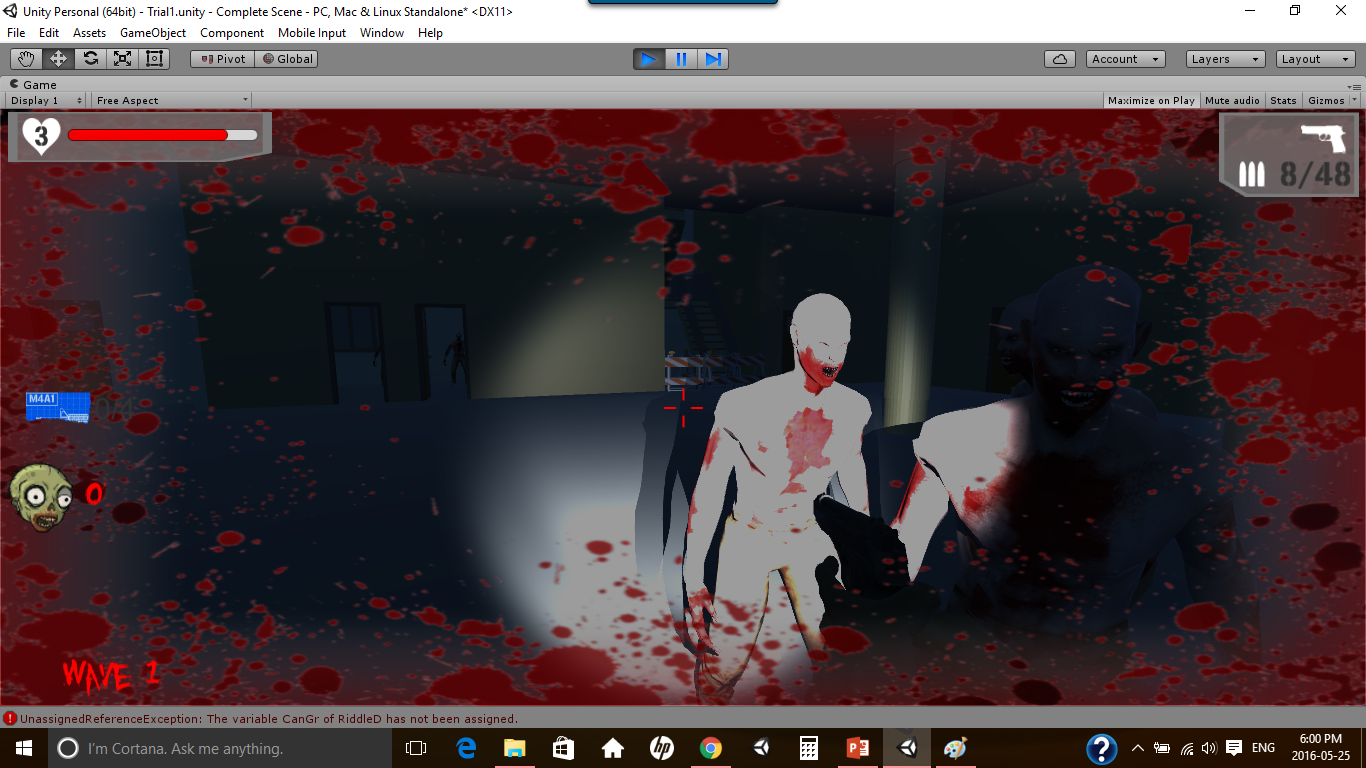 The bloody screen effect indicate that the player was attacked.
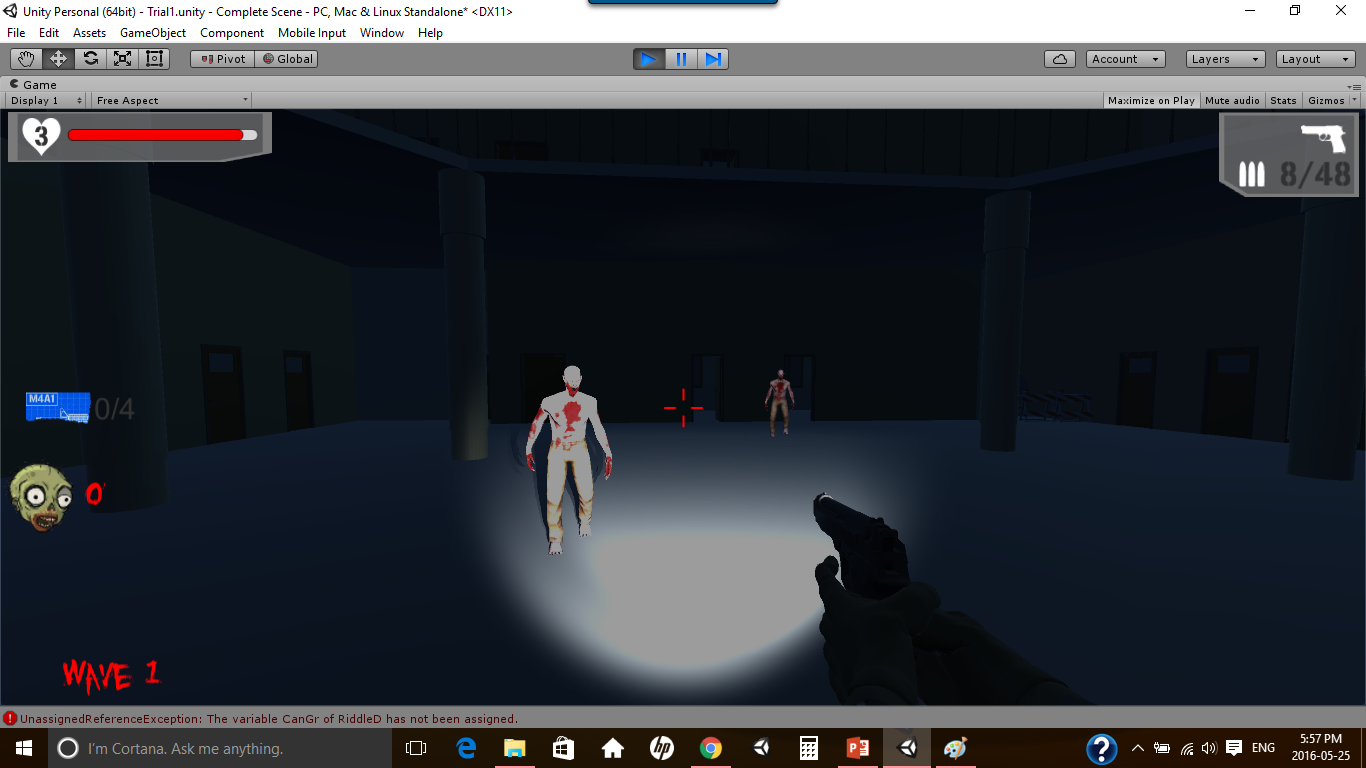 This is the inside of M7. There are not much lights, other than the torch from the first-player person, since it is dark at night and lights are off.
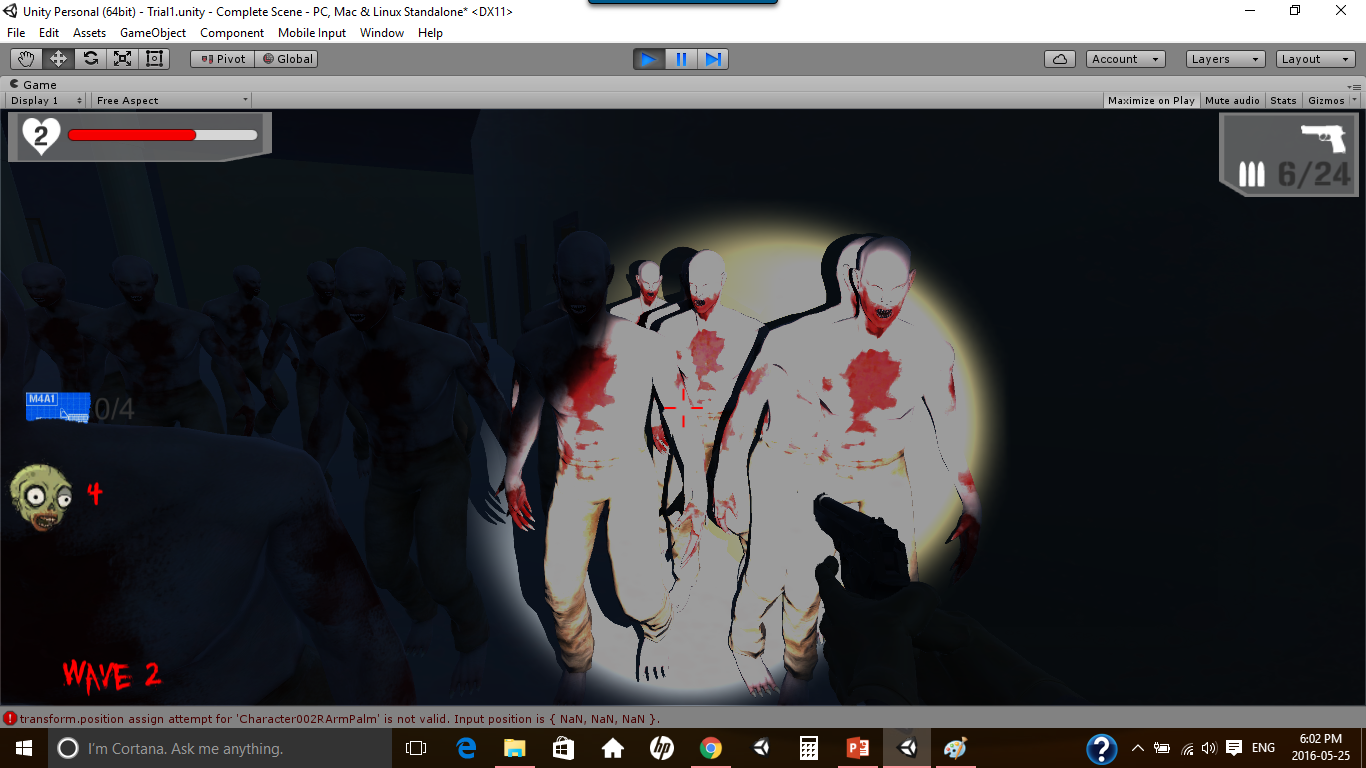 These are a horde of zombies approaching the player to attack them.
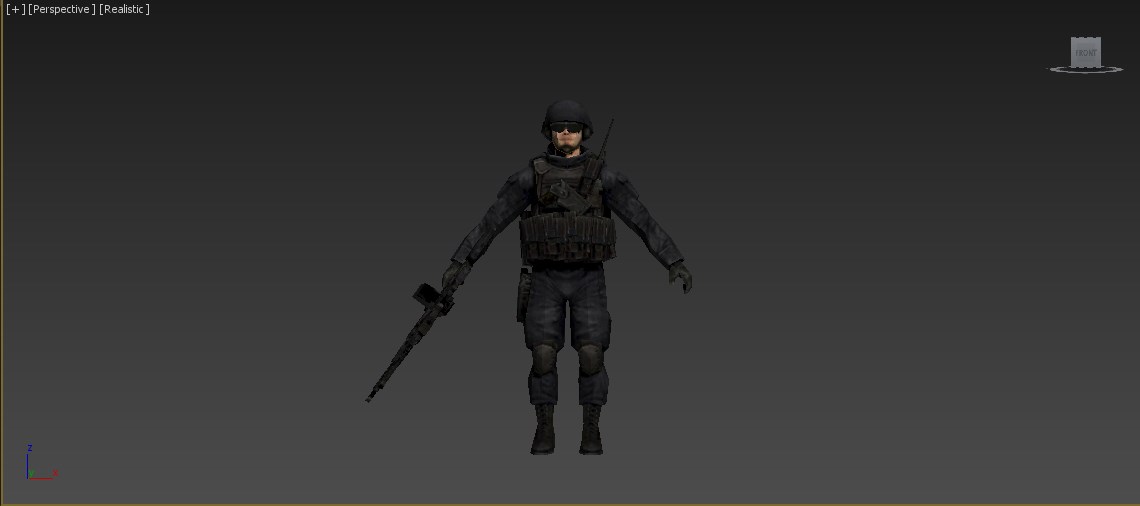 This is the 3D model used for the FPS player. It is downloaded from the internet. Source: click here.
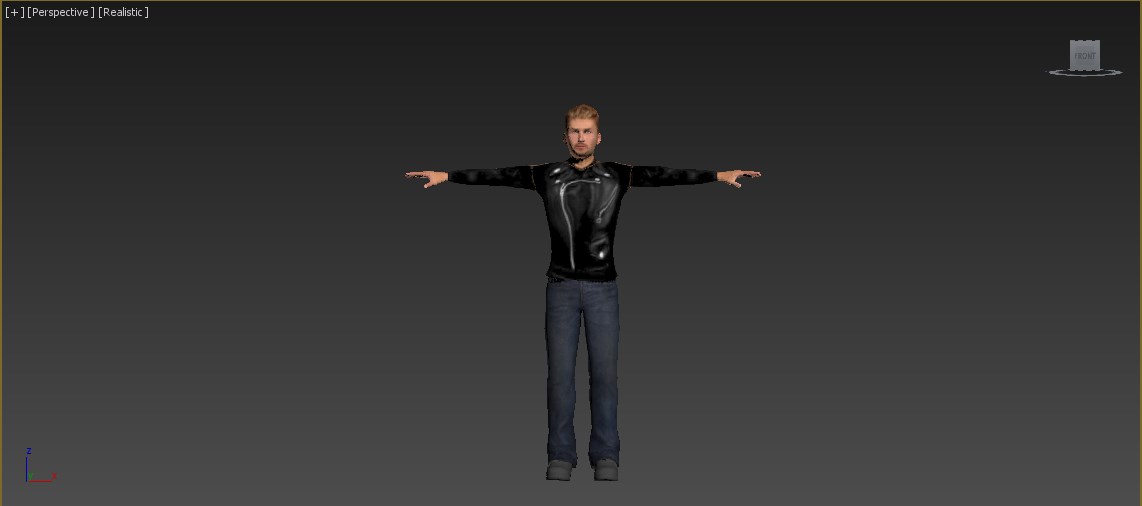 This is the 3D model used for the Hostage. It is downloaded from the internet. Source unknown.
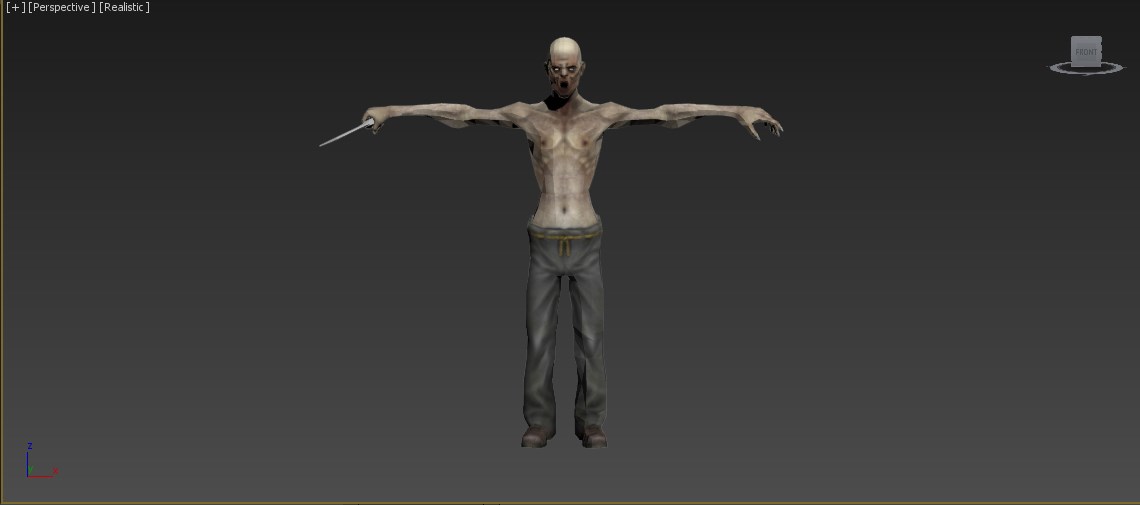 This is a 3D model used for one of the zombies. It is downloaded from the internet. Source: click here
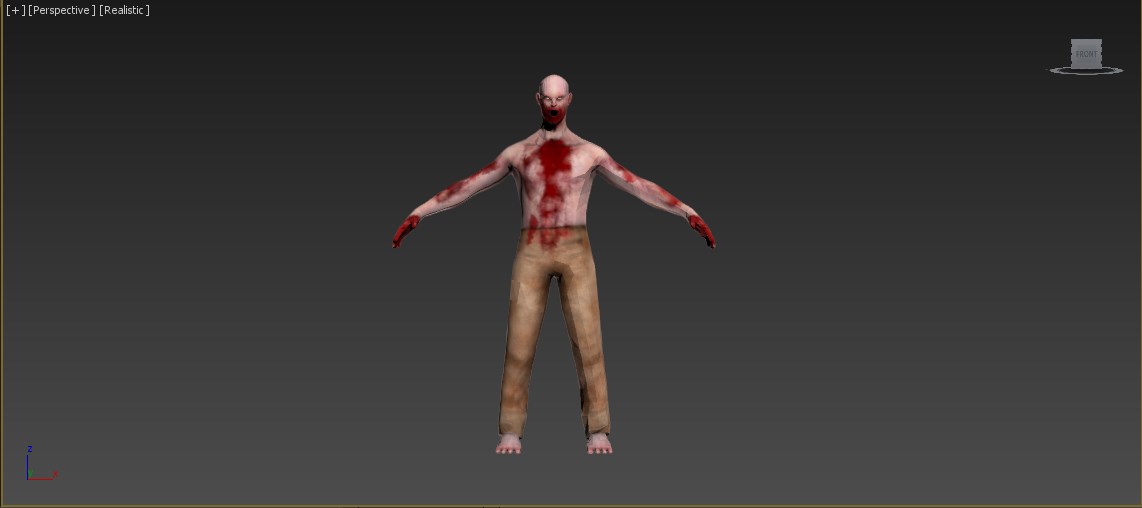 This is a 3D model used for one of the zombies. This model was the most used among the all of the zombie models. It is downloaded from the internet. Source unknown.
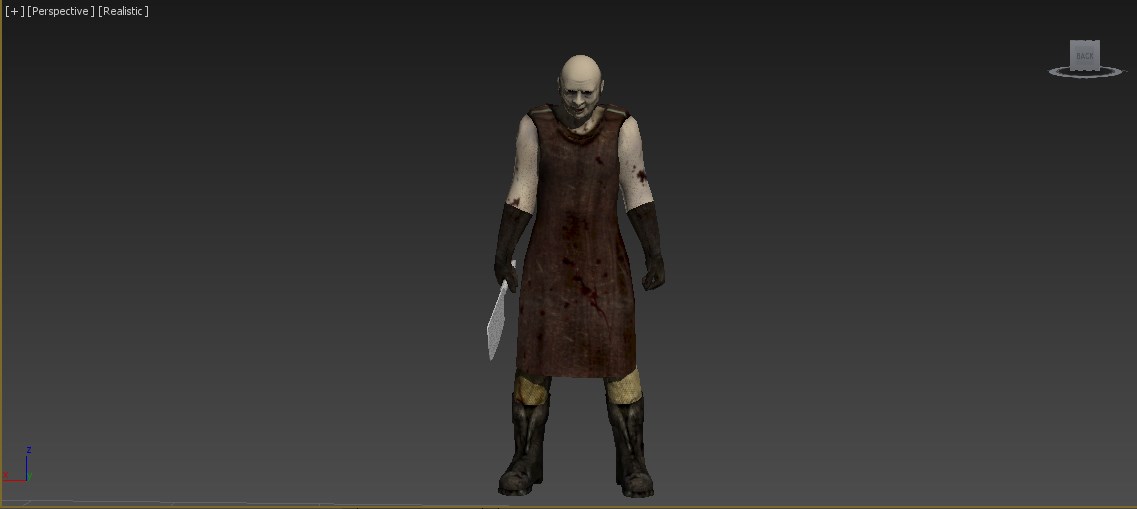 This is a 3D model of one of the zombies. It is downloaded from the internet. Source unknown.
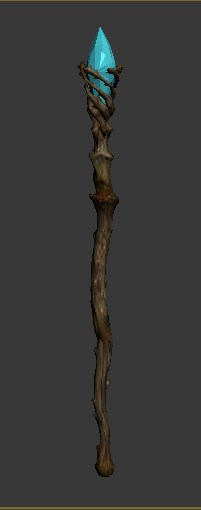 This is the 3D model used for the scepter. At the end of the game, the player will need to shoot the scepter to win.
The model is downloaded from the internet. Source unknown.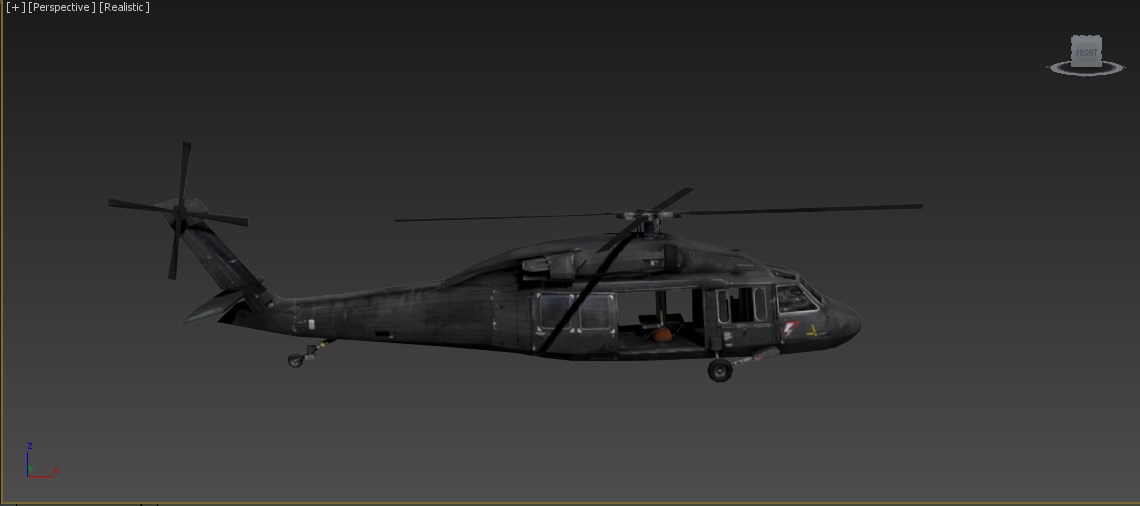 This is the 3D model used for the helicopter. In phase 3, the player is required to deliver the hostage to it. The helicopter is located on the roof of M7.
The model is downloaded from the internet. Source unknown. This screenshot is about the final boss that takes place in M9. The fight of the final boss is Phase 4. It consists of the following:
- The Big Final Zombie Boss;
- 4 Evil Dogs; and
- The Scepter.
In fact, thoughout the game before Phase 4, the entry to M9 is locked because it is saved for mentioned phase. A view of the university's campus.
Content Description

.png)
1 / 4

.png)
-
2.
mARbles
Category
Video Game
Duration
January 2018 - August 2018
Company
Sheridan College
Location
Oakville, Ontario, Canada
Description
Slideshow
This is a "trailer" of the project, which was done by another team member of the project. In the video, I'm the guy with the red T-shirt that says "NYC". This is the advertising poster of the game. It was done by the artist of our group.
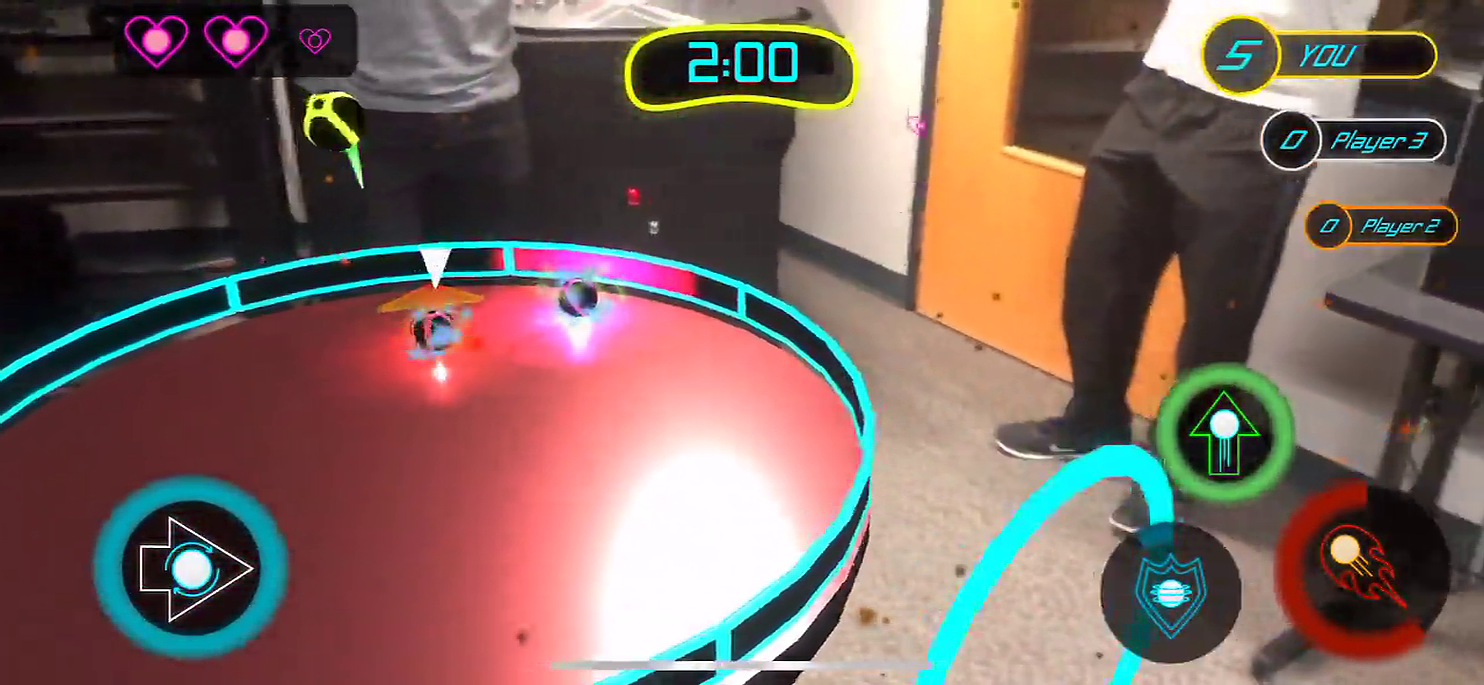
 This is a general view of the game. As you can see, there are:
- 2 marbles;
- An arrow that fades from yellow to red;
- Amber particles around the red marble;
- The following UI elements:
- A white over the red marble;
- 3 buttons on the bottom-right corner:
- A blue button with a shield icon (Defense Button);
- A green button with an arrow icon pointing to the top (Jump Button); and
- A red button with a fire icon (Attack Button); and
- A white button on the bottom-left corner with an arrow pointing to the right (Move Button);
- A timer on the very top-middle of the screen;
- 2 big, full hearts and a small, empty heart on the top-left corner of the screen; and
- A ranking system on the top-right corner of the screen.
 This is a view of the marbles defending themselves. Notice the red and pink marbles being surrounded by blue particles, which indicate that they are defending themselves (The red marble is the marble of the current player). Also, take a look on how the blue frame of the blue button (Shield Button) has disappeared. It will gradually re-appear and refill by a certain number of seconds.
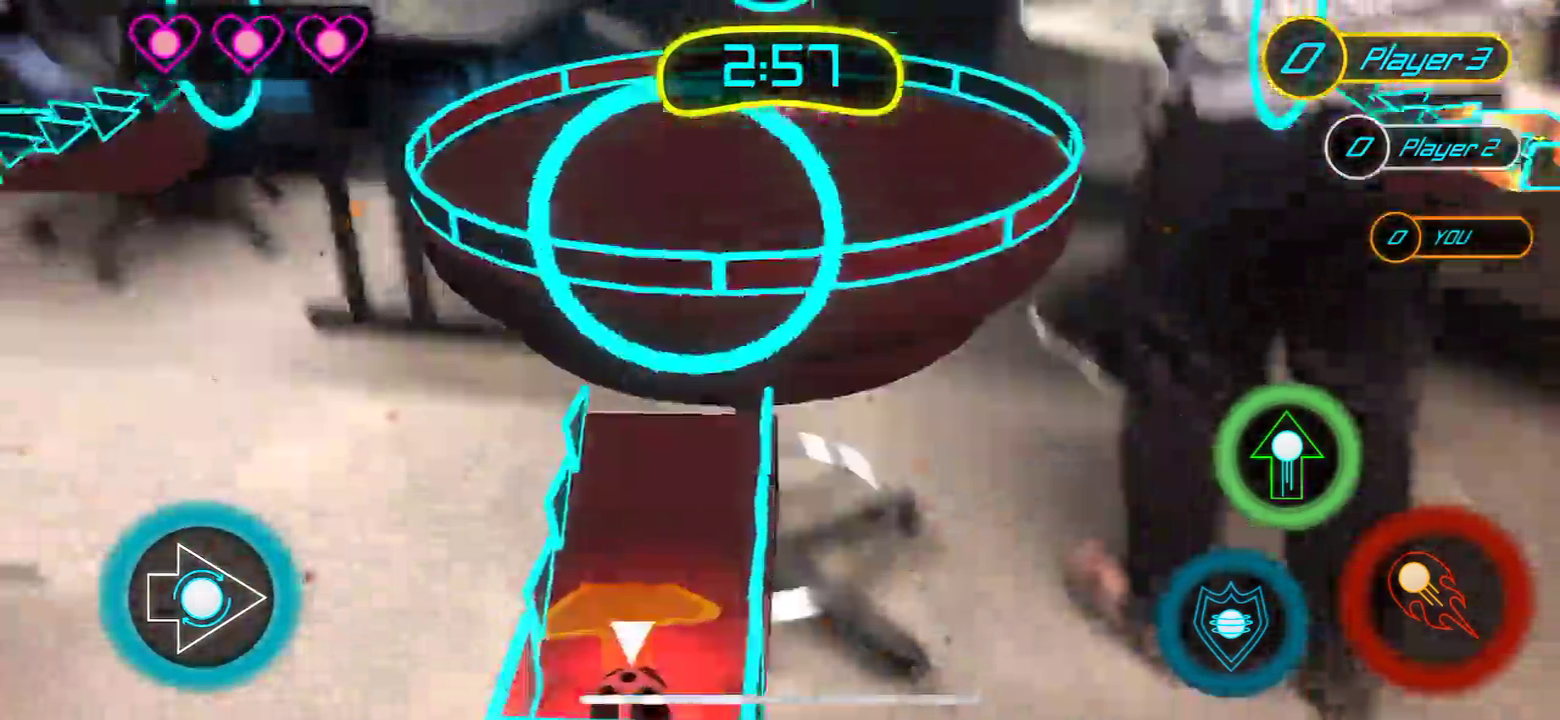 This is the starting point of a marble. There are 4 starting points in the scene, and each one belongs to a specific player/marble. When the game starts, or if the marble dies, they start from this spot. The player should press the red button to jump into the main arena.
 This is the arrow of where the player is facing in respect to the camera.
Content Description
1 / 4
-
3.
Mixed Reality Project
Category
Application
Duration
June 2022 - July 2022
Company
Athabasca University
Location
Athabasca, Alberta, Canada (Remote)
Description
During my time at Queen's University, I was enrolled in a course in another University, called Athabasca University. The reason for my enrollment was to because I had failed a course. Therefore, to compensate for this, one solution was to enroll in a program while simultaneosly to my master's project during the spring and summer. The name of the course that I was enrolled in is "Human Computer Interaction". For more information, click here.
When I was taking this course, we had to do a final project for it. Initially, I wanted to make a mixed reality (MR) application in Unity that takes advantage of Nintendo Switch's Joy-Con controllers. These controllers were a perfect combination between XR controllers and traditional controllers. Unfortunately, capabilities of the Joy-Cons outside of their purposed console were very thin. Even open-source tools did not provide much help. Thus, I had to revert to a more traditional game controller, specifically the DualShock 4.
Basically, the application is about changing the propeties of a virtual cube in an MR environment. The most accessible way to create an MR scene was to have a phone be used as a headset. To make the experience complete, however, I also had to use a special type of headset, one that can be used for turning smartphone into one. The additional headset component is displayed and described in the slideshow.
The user can change the cube's:
- Color;
- Opacity;
- Position;
- Rotation; or
- Size.
- One is to change the visual properties (color and opacity) of the cube; and
- The other is to change the geomterical properties (position, rotation, and size) of the cube.
Another technology that was used to make this small application is called "Raycasting". In Unity, a raycast is a straight, invisible line that starts from a certain point (In this project's case, it would be the very middle of the user's view.) and continues either infinity or to a certain distance until it hits an entity. To demonstrate that raycasting works, there is a red circle in the center of the user's view. If the raycasting line detects something that the user can interact with, the red circle will turn green.
Slideshow
This is a video demonstrating the project in action.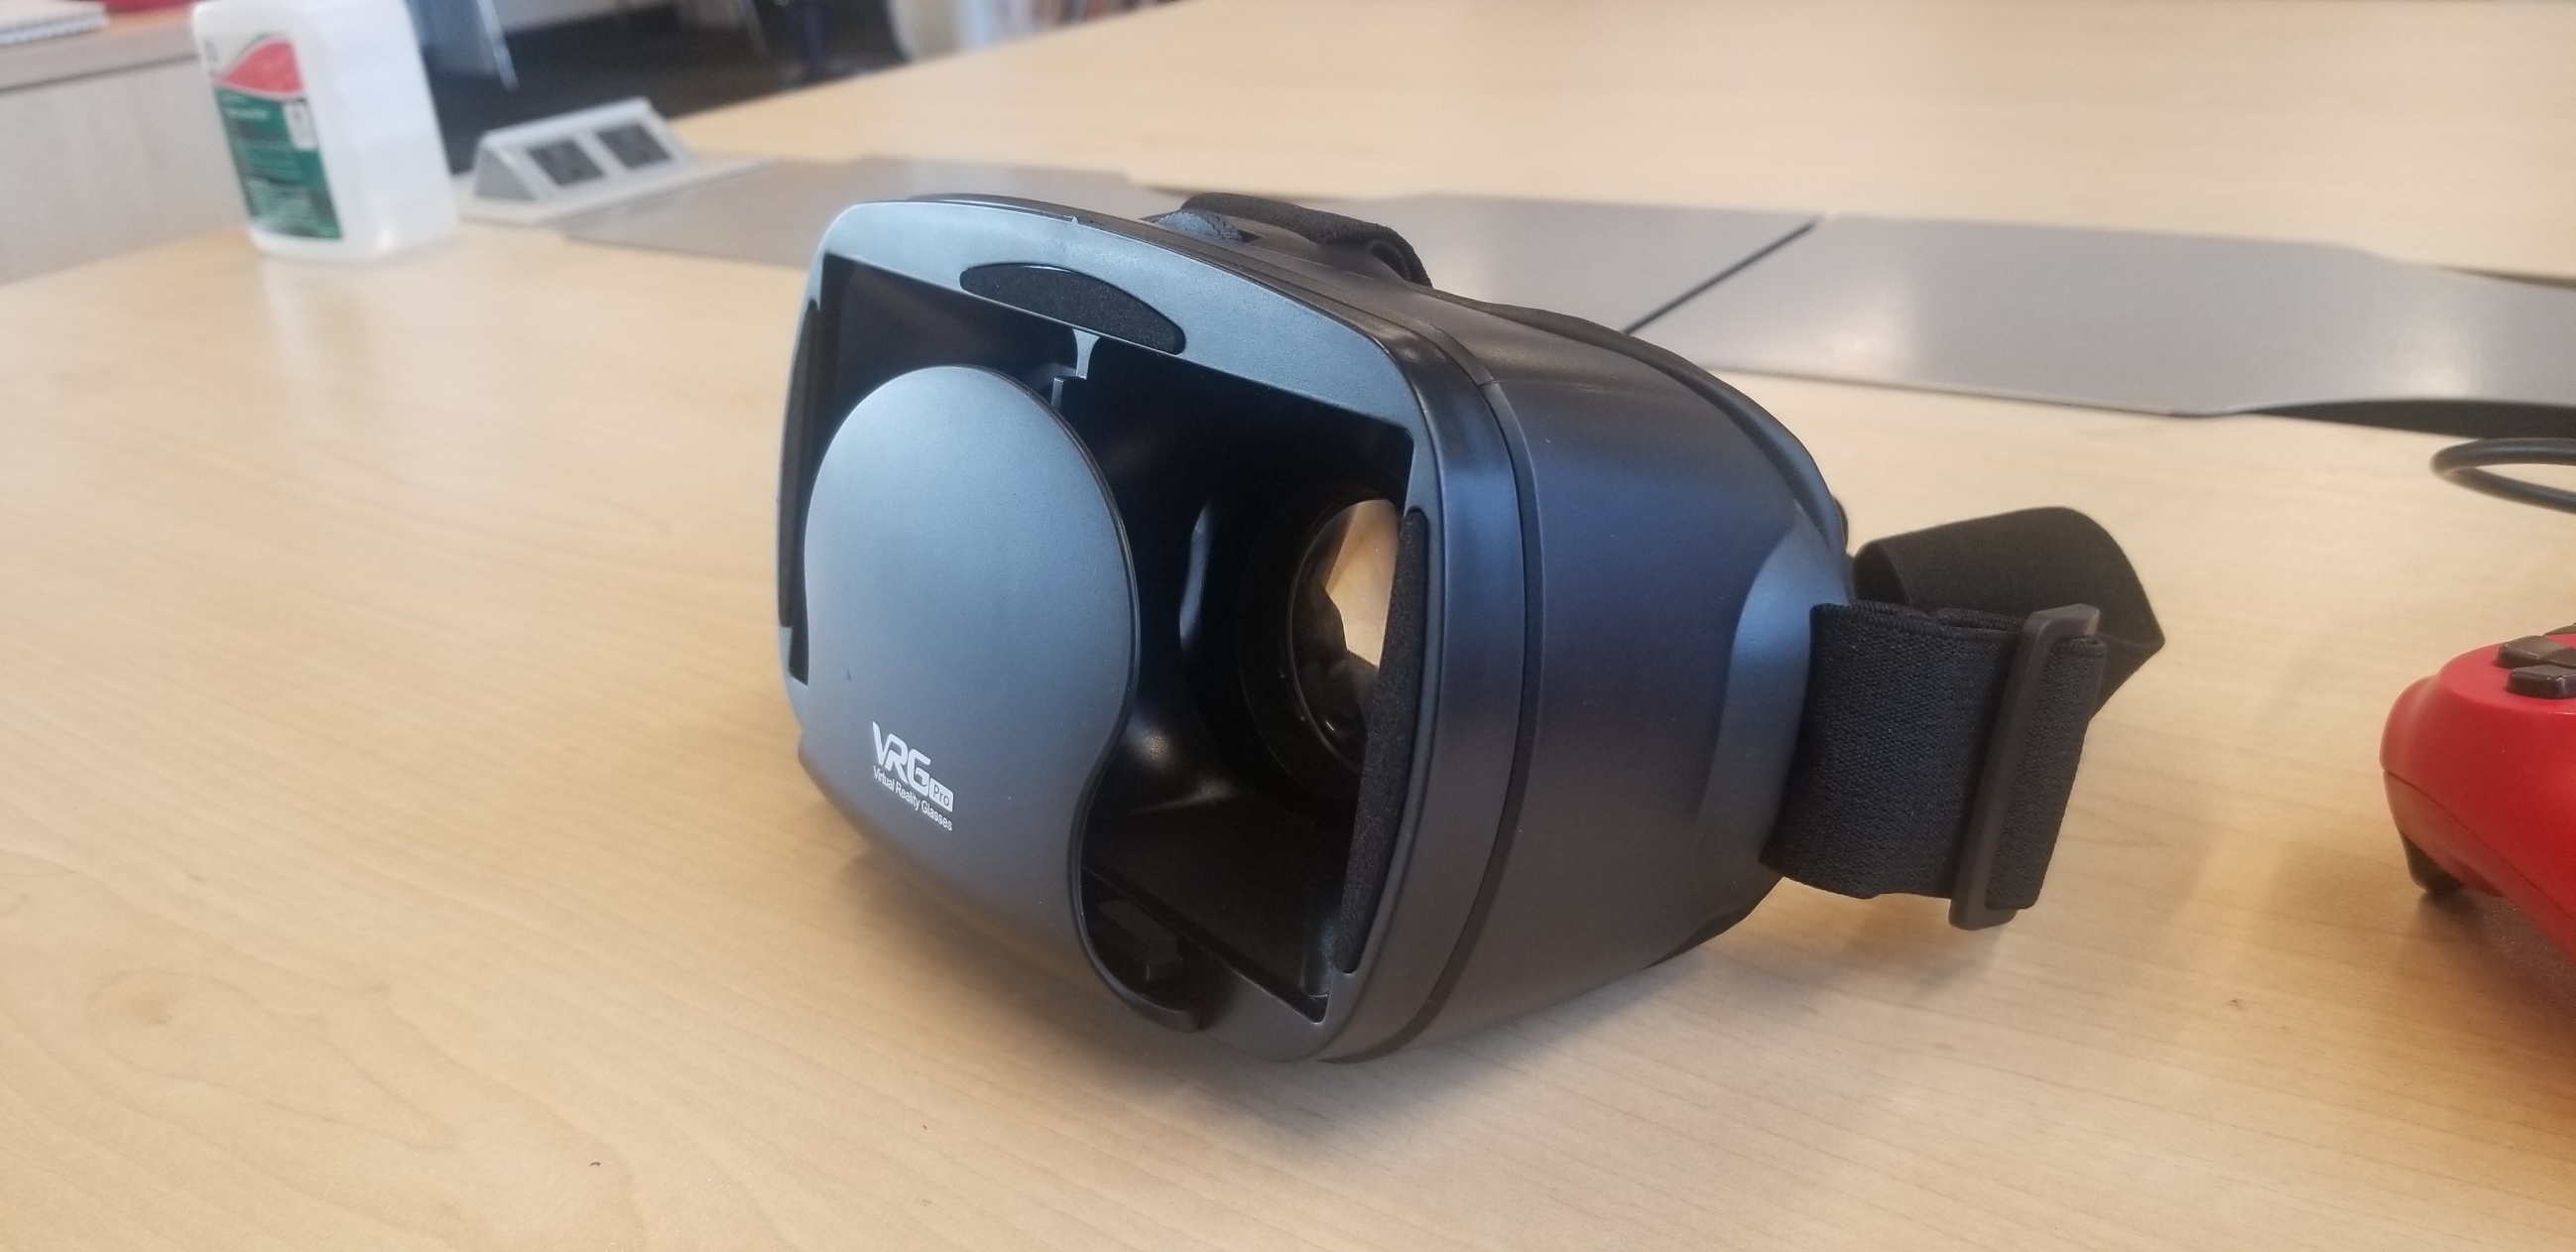 This is the headset for smartphones that I used for the project. Conveptually, it is similar to Google's Cardboard. A user can insert his/her iPhone or Android phone into the headset and use this combination as a virtual reality (VR) headset. I bought the product from Amazon Canada. For more information about the product, click here.
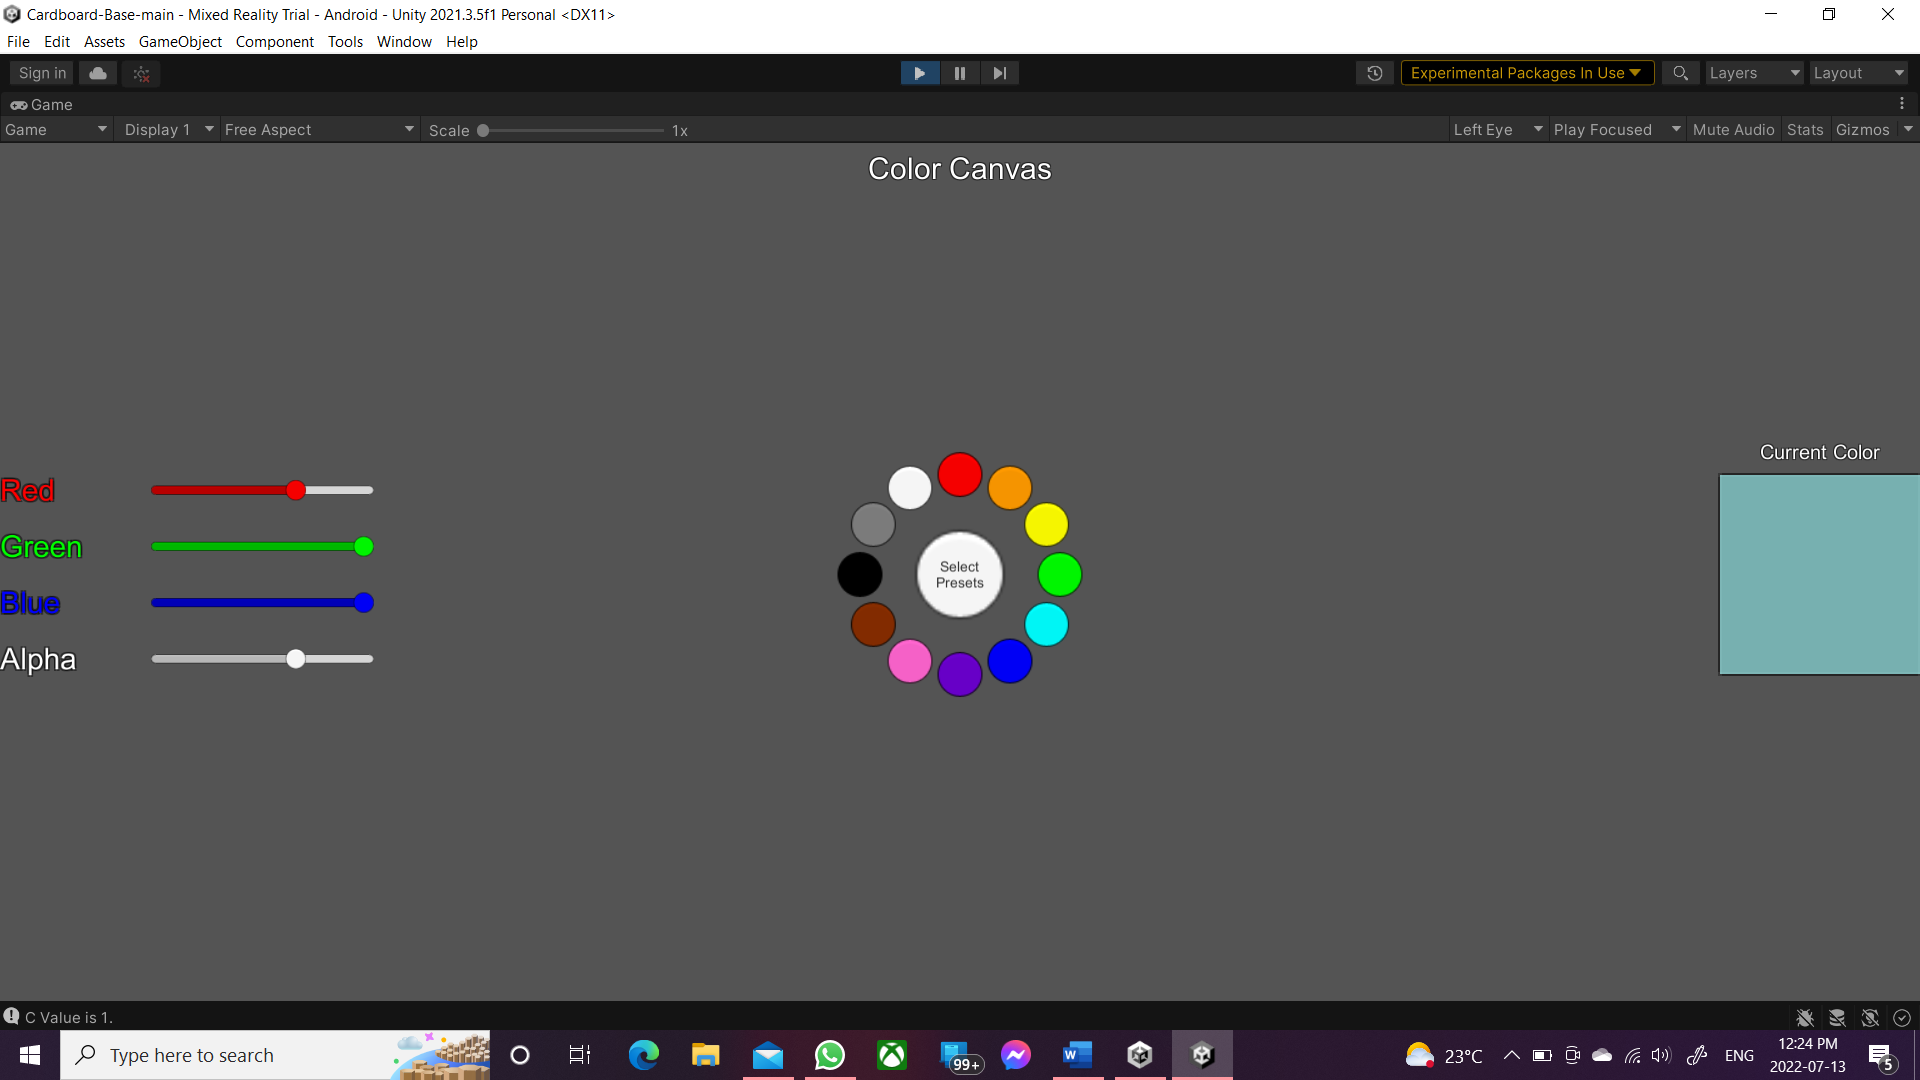
This is the color canvas. It has 4 sliders, 12 buttons for preset colors, and a square to show the current color. The coloring scheme follows the RGBA coloring rule. RGBA stands for "Red-Green-Blue-Alpha".
The sliders give the user more flexibility and precision on what color and opacity that he/she might like to pick. Each of the sliders works as follows:
- "Red" is used to change the level of the red color;
- "Green" is used to change the level of the green color;
- "Blue" is used to change the level of the blue color; and
- "Alpha" is used to change the opacity level.
Another option to select colors is to use the preset colors provided. In the very middle of the canvas, there is the "Select Preset" button. At first, the colored buttons around it would be hidden. When the user presses it (via raycasting), the colored buttons will appear. When a colored button is clicked on, its color will be the selected color of the cube. Also, the first three sliders will change their values to match that for the selected color, and the value of the "Alpha" slider will be set to 100%.
As you can see in the image, the buttons are displayed like a prefect circle around the "Select Preset" button. Programatically, this is done using a "for" loop. The number of iterations of the loop equals the total number of colors provided. In this case, it is 12. The procedure of each loop is as follows:
- We get the angle of direction for each iteration, using the following function: Θi = ((i * 360) / n), where:
- "i" is the integer number of the current iteration (It increases by one in every iteration.);
- "Θi" is the angle of the current iteration ("Θ" is a greek symbol, and it is pronounced "Theta".);
- "n" is the total number of iterations (Also, an integer, 12 in this case.); and
- 360 is the angle of a full circle in degrees (In radians, it would be 2π, instead.).
- "π" is also a greek symbol, and it is pronounced "PI". It is a constant value roughly equal to 3.1415926535.
- We get the sine and cosine values of Θi to know the button's directions in the x and y axes, respectively.
- diri.x = sin(Θi);
- diri.y = cos(Θi).
- We multiply the sine and cosine values with a magnitude (or a radius). I set the radius to 5.
- posi.x = diri.x * 5;
- posi.y = diri.y * 5.
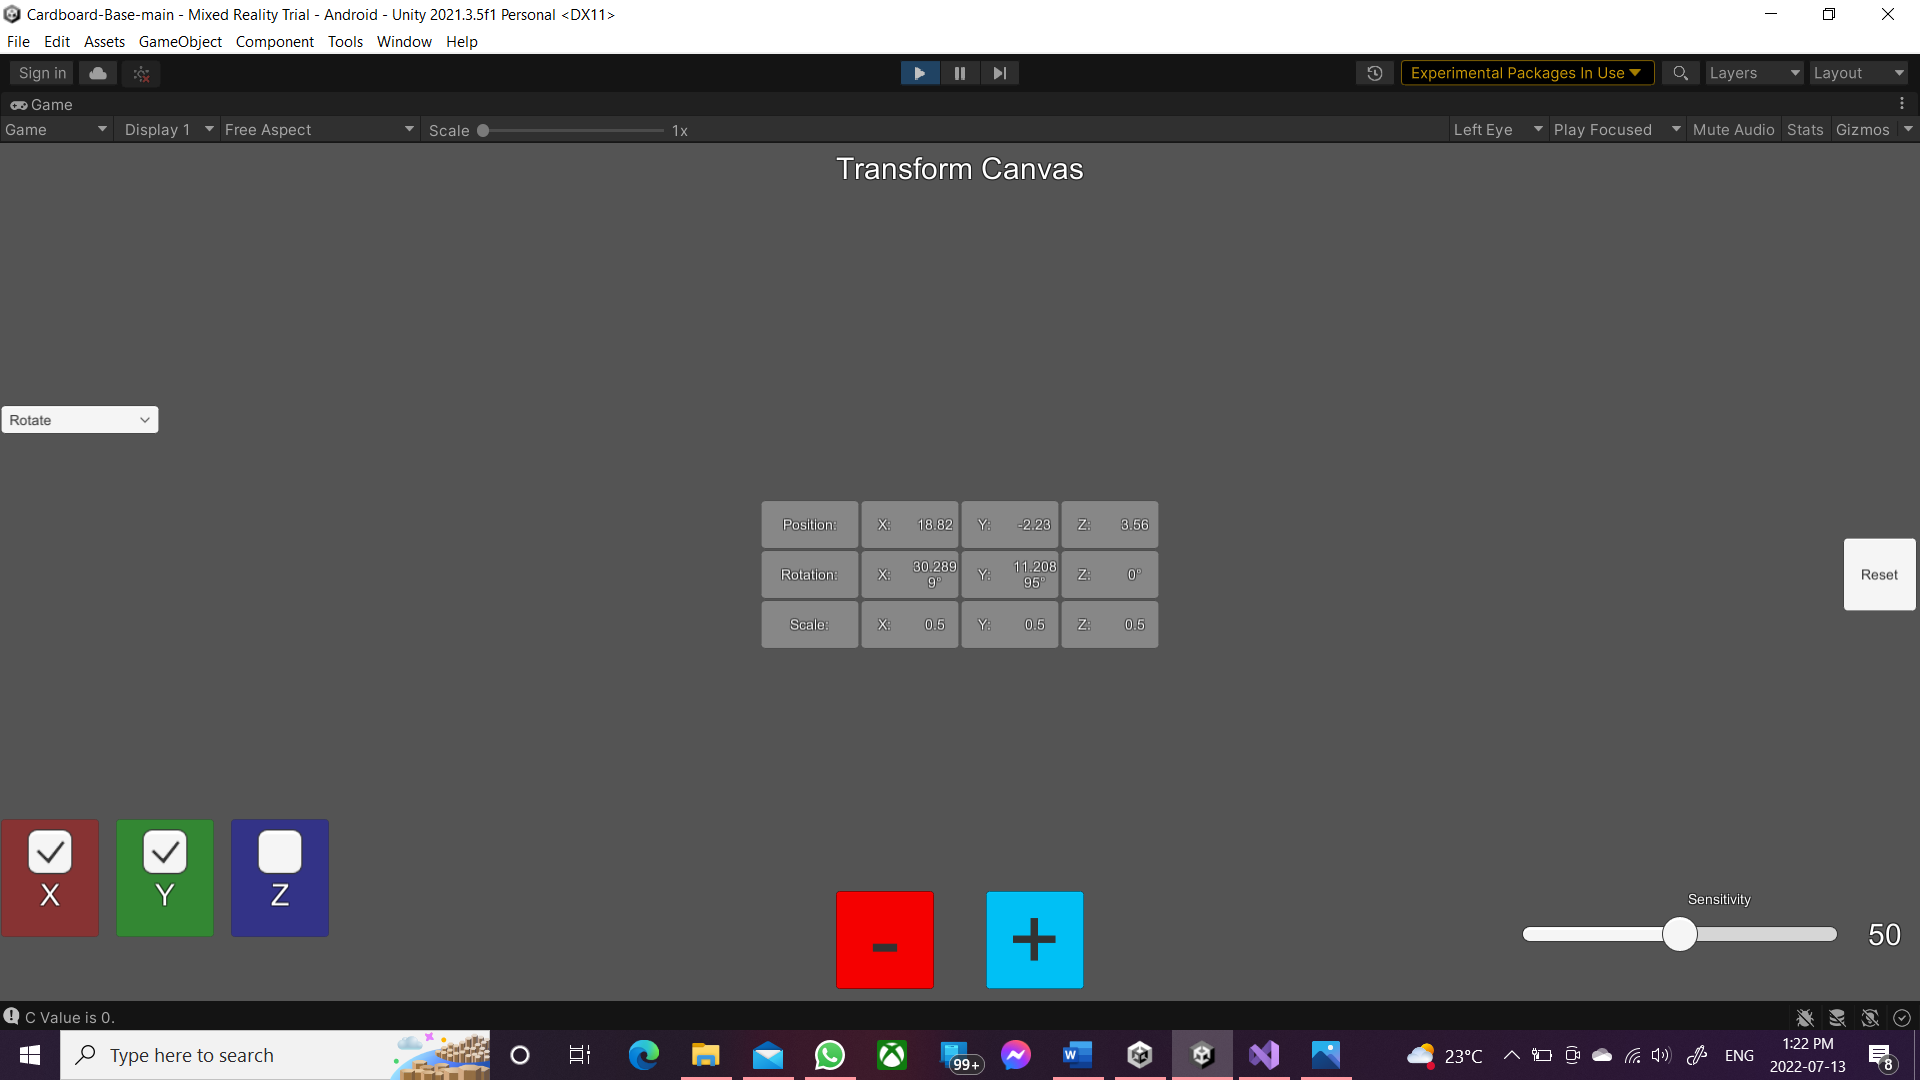
This is the geometry canvas (Or Transform canvas). It has the following components (or UI elements):
- A Dropdown List;
- Three Tick Boxes;
- "-" and "+" Buttons;
- A Sensitivity Slider;
- A "Reset" Button; and
- A Display Panel;
The dropdown list provides the options of what geometrical property of the cube would the user want to modify. The options are:
- Position (Default Option);
- Rotation; and
- Size.
The three tick boxes tell in which axis or axes would the user want to modify the germetrical property of the cube. Each tick box correspond to a specific axis. They are:
- x-axis (In Red, Right and Left Axis);
- y-axis (In Green, Up and Down Axis); and
- z-axis (In Blue, Forward and Backwards Axis).
The cyan "+" button and red "-" button are used to respectively increase or decrease the values of the selected geometrical property of the cube. When pressing either button, the changes are based on the selected property in the dropbox, the selected axes in the tick boxes, and the value of the sensitivity slider. Mentioned slider is used for controlling the quantity/amount of change per press of either button.
The "Reset" button is for resetting the geometrical properties of the cube back to their original values.
Lastly, the panel in the middle shows the geomterical values of the cube. The panel updates with the changes that happen onto the cube. The panel is presented like a table, where the rows represent the geometrical properties and the columns represent the axes.
This is the starting point of a marble. There are 4 starting points in the scene, and each one belongs to a specific player/marble. When the game starts, or if the marble dies, they start from this spot. The player should press the red button to jump into the main arena.
This is the arrow of where the player is facing in respect to the camera.Content Description
1 / 4
Award
-
1.
The Magic Number
 Event
UoS Computer Festival
Event
UoS Computer Festival Time
December 2014
Company
University of Sharjah
Location
Sharjah, the United Arab Emirates
Time
December 2014
Company
University of Sharjah
Location
Sharjah, the United Arab Emirates
 Ranking
Third Place
Ranking
Third Place
Description
During my time in the University of Sharjah, I took a course called "Web Development". In that course, I did a small project which was a webpage that can output any number between 1 and 31 inclusively. The procedure is as follows:- I would ask a user to think of any number within mentioned range;
- I would go through 5 tables, each with a checkbox;
- Lastly, I would click the "Submit" button and the number will appear in a textbox.
Professional Experiences
-
1.
Intern
Duration
July 2015 - August 2015
Company
Newcastle University Location
Newcastle upon Tyne, England, the United Kingdom
Location
Newcastle upon Tyne, England, the United Kingdom Website
Description
As part of my Bachelor's program, I had to do an internship. I did mine in Newcastle University. There, I learned about two new game engines: Construct 2 and Unreal Engine 4.
-
2.
Cashier
Duration
September 2018 - August 2021
Company
Walmart Location
Oakville, Ontario, Canada
Website
Location
Oakville, Ontario, Canada
Website
Description
Hello, there.
-
3.
Game Developer and Research Assistant
Duration
October 2023 - Present
Company
University of Sharjah
Location
Sharjah, the United Arab Emirates
Website
Description
Hello, there.
Courses
-
1.
Character Drawing
Official Name
Character Art School: Complete Character Drawing
Duration
June 2021
Platform
Udemy Website
Webpage
Website
Webpage
Description
Hello, there.
My Skills
Programs
-
Unity
95%
-
Unreal Engine
90%
-
Visual Studio
85%
-
Photoshop
85%
-
Illustrator
80%
-
Dreamweaver
80%
-
Microsoft Word with White Glow.png "Microsoft Word")
95%
-
Microsoft Powerpoint with White Glow.png "Microsoft Powerpoint")
95%
-
Microsoft Excel with White Glow.png "Microsoft Excel")
90%
-
Microsoft Visio with White Glow.png "Microsoft Visio")
75%
-
GitHub
85%
-
Perforce
70%
Programming Languages
-
C++
85%
-
C#
80%
-
Java
80%
-
Python
70%
-
HTML
85%
-
CSS
80%
-
JavaScript
80%
-
XML_logo with White Glow.png "XML")
80%
Programming Skills
-
Gameplay Programming
Gameplay Programming90%
-
Tools Programming
Tools Programming85%
-
UI Programming
UI Programming85%
-
Physics Programming
Physics Programming70%
-
AI Programming
AI Programming75%
-
Data Saving and Encryption
Data Saving and Encryption70%
-
Path Finding
Path Finding65%
Languages
-
English
95%
-
Arabic80%
Other Skills
-
Communication Skills
Communication Skills85%
-
3D Math Skills
3D Math Skills80%
-
Problem-Solving Skills
Problem-Solving Skills80%
-
Character Drawing
Character Drawing60%
Contact Me
Follow Me


.png "Email")


